 Chisel
Established Credentials
Master Craftsman
Guild of Master Craftsmen
2019
Heritage Excellence
Historic England
2021
Conservation Award
SPAB
2022
Listed Buildings
IHBC Accredited
2020
Natural Stone
Stone Federation GB
2023
Best Restoration
RICS Awards
2024
Bath Limestone
Cotswold oolitic beds, Somerset
Formed ~165 million years ago
Creamy, fine-grained, workable with a chisel. Weathers to a warm honey tone over decades. Best for carved details, ashlar coursing, and ornamental string courses.
Specification Note
Vulnerable to acid rain in urban settings; requires lime-based mortar with no Portland cement.
York Sandstone
Millstone Grit, West Yorkshire
Formed ~310 million years ago
Coarse, gritty, deeply bedded. Resists frost and mechanical wear. The material of northern boundary walls, bridge abutments, and mill buildings.
Specification Note
Difficult to carve fine detail. Must be laid on its natural bed or face spalling within a generation.
Purbeck Marble
Isle of Purbeck, Dorset
Formed ~145 million years ago
A freshwater limestone that polishes to a dark, fossil-rich sheen. Used in English cathedrals since the 12th century for shafts and decorative inlay.
Specification Note
Rare and costly. Sourcing requires quarry relationships built over years, not weeks.
Cornish Granite
Bodmin Moor, Land's End
Formed ~280 million years ago
Interlocked crystals of quartz, feldspar, and mica. Near-indestructible once set. The correct choice for exposed boundary walls, gatepiers, and coastal facades.
Specification Note
Demands diamond tooling and patience. A dressed granite face takes four times the labour of limestone.
How We Select
"We read the quarry like a book. The bedding planes, the colour variation across the face, the moisture content at depth — these tell us which lifts will perform over generations and which will fail within a decade."
— James Whitmore, Master Mason, Chisel
Free Resource
The Stone Selection Guide
32 pages covering stone identification, mortar compatibility, bedding orientation, and weathering prediction for the four principal building stones of England. Written for homeowners and architects alike.
Download the Guide — FreeChapter II — Workshop
What happens between the quarry
and the wall.
Most of what determines a piece's longevity happens in the workshop, not on site. The sawing, the profiling, the tooling of the face, the cutting of the joint — these decisions are made here, in the quiet, before the scaffolding goes up.
The Six Stages of Hand Tooling
Scappling
The initial rough reduction — a steel scappling hammer removes the quarry waste and establishes the approximate face. Not yet cutting, only clearing.
Drafting
A narrow chisel cuts a true line around the perimeter of the face. This draft line is the reference from which all subsequent work is measured. Everything must be true to this line.
Boasting
A broad bolster chisel works across the face in parallel strokes, removing the high spots between the draft lines and approaching the finished plane.
Punching
A point tool picks across the face, raising a fine textured surface. Used for rusticated work or as a base for finer finishes on harder stones.
Crandalling
A multi-pointed crandall tool produces a fine, even stipple. The finish seen on Georgian doorsteps and polite ashlar where a smooth face would look too raw.
Fine Tooling
A fine-toothed chisel drawn in parallel lines produces the combed finish characteristic of high-quality Victorian stonework. Takes twice the time of any other finish. Worth it.
Joint Types & Mortar Specification
The joint is not just the gap between stones — it is the drainage system, the movement allowance, and the visual rhythm of the wall. Getting it wrong is permanent.
Critical Rule
Never use Portland cement on pre-1919 buildings. It is harder than the stone and will cause spalling within 20 years.
Flush Joint
Ashlar coursing, interior work
Mortar finished level with the stone face. Clean, formal, and correct for dressed limestone. Allows water to drain freely across the face without pooling.
Recessed Joint
Rubble walling, period repair
Mortar set back 8–12mm from the face. Creates shadow lines that reveal the coursing rhythm. Appropriate for vernacular buildings where flush pointing would look alien.
Weathered Joint
Exposed boundary walls, copings
Angled forward at the top to shed water away from the bed joint. The correct choice for horizontal surfaces and any wall facing prevailing weather.
Ribbon Pointing
Victorian-era decorative work only
Raised above the stone face. Traps water, cracks within years, and accelerates decay. We encounter it constantly on Victorian restorations. We always remove it.
Chapter III — On Site
Where the work
becomes permanent.
The scaffold goes up. The stone comes off the banker and onto the wall. At this point, every decision made in the quarry and the workshop either pays off or doesn't. There is no correcting a mis-bedded stone once the mortar has gone off.
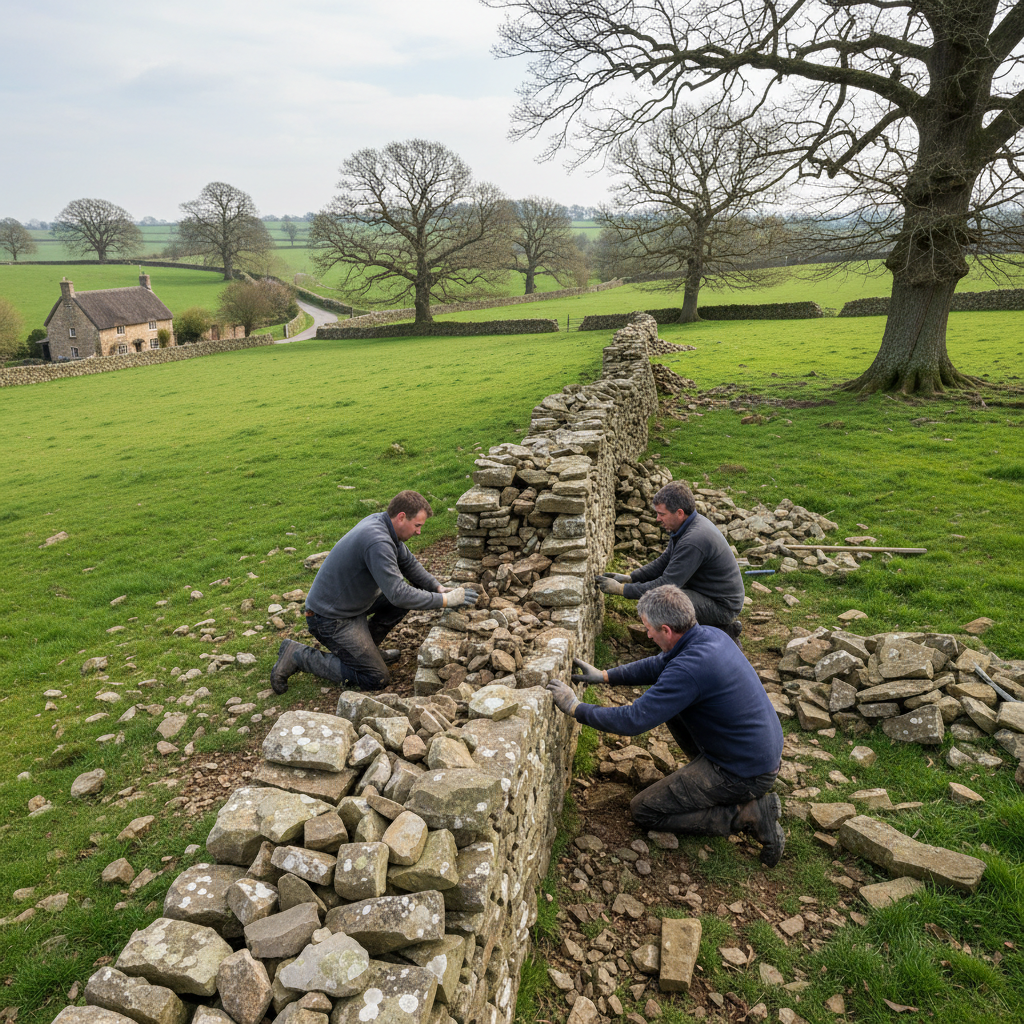
Dry-stone and mortared rubble repair
Heritage Boundary Walls
A boundary wall that has started to lean has usually lost its batter — the slight inward slope that keeps it stable under frost heave. We rebuild from the foundations, re-establishing the correct batter angle and relaying the throughs (tie-stones) at the right intervals. No shortcuts with wall ties or concrete cores.
Specification
Typical spec: NHL 2 lime mortar, 1:3 mix. Coping stones bedded in lime putty. Rebuild rate: 4–6 linear metres per day.
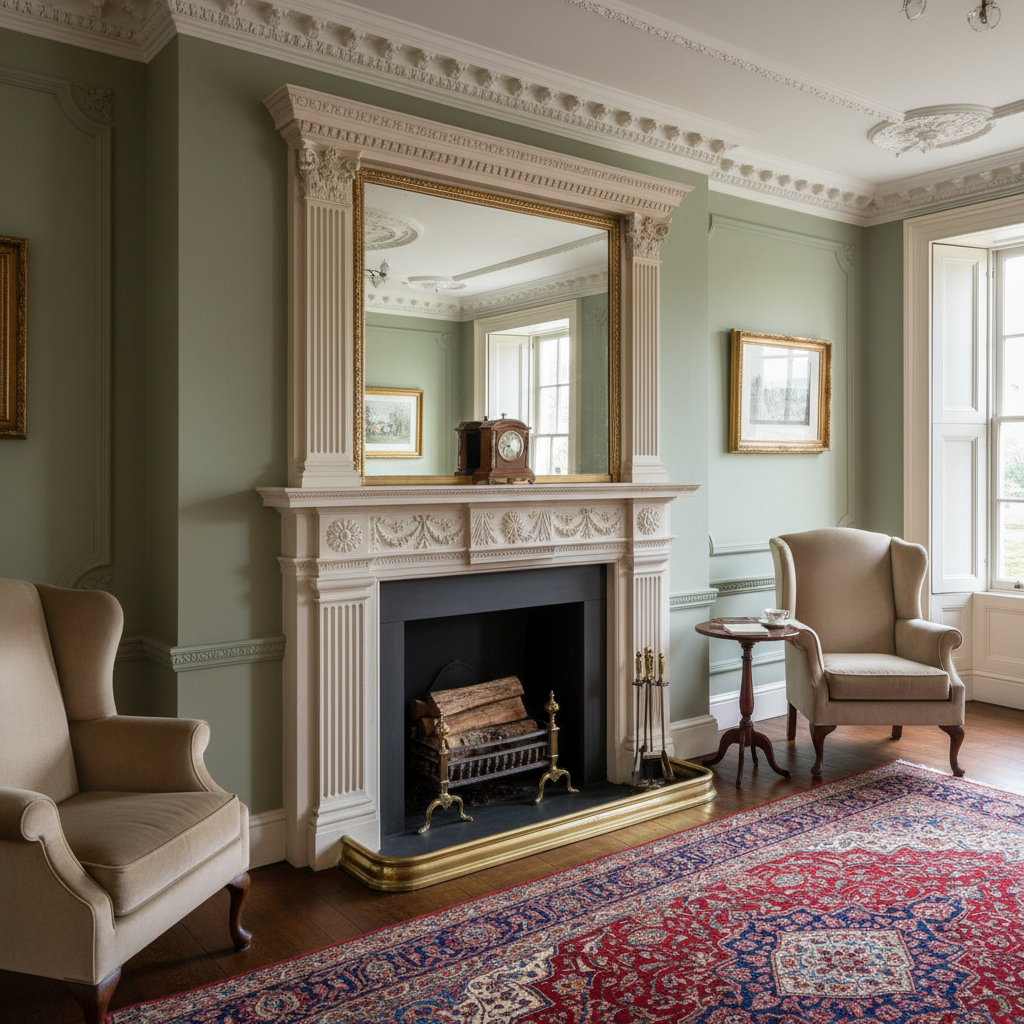
Carved stone surrounds and hearthstones
Hearths & Fireplaces
A limestone hearth surround is one of the few pieces of stonework in a house that is touched daily. The profile must be exactly right — a moulding that's 2mm out of true will be felt by every hand that rests on the mantel shelf. We cut every profile from solid stone, never from cast reconstituted material.
Specification
Typical spec: Bath limestone or Purbeck marble. Moulding profiles drawn from period precedent. Installation: 2-day fit with full lime bedding.

New build and restoration coursing
Facades & Ashlar
Ashlar — precisely cut stone laid in regular courses with fine joints — demands tolerances of ±1mm across the face. We use a banker (a masonry bench) in the workshop to cut every stone to finished dimension before it reaches the scaffold. Nothing is adjusted in situ except the mortar joint width.
Specification
Typical spec: York sandstone or Cotswold limestone. Joint width: 6–8mm. Face tolerance: ±1mm. Setting rate: 1.5–2m² per mason per day.
Weatherproofing
The pointing is the last line of defence. It is also the most frequently botched.
We use only natural hydraulic lime mortars matched to the original binder. We never apply sealants or waterproofing coatings to natural stone — they trap moisture inside the wall and accelerate the decay they are sold to prevent.
Lime mortar carbonation
28 days minimum cure before exposure
Frost protection
Hessian and polythene wrapping, no work below 3°C
Joint depth
25mm minimum for new pointing
Raking depth
Old mortar removed to 25mm before repointing
Commissions
The work speaks through the people
who commissioned it.
We'd had three masons look at the boundary wall. Two recommended rendering over it. Chisel was the only firm that identified the problem correctly — the copings had been relaid with OPC mortar in the 1980s and were trapping water in the core. They rebuilt 40 metres over two seasons. It looks as though it was never touched.
Margaret Thornton-Hall
Homeowner, Grade II Listed Farmhouse
North Yorkshire
I specify natural stone on heritage projects regularly. What sets Chisel apart is their documentation — every mortar mix, every stone source, every tooling decision is recorded and handed over with the job. That matters enormously when the building is listed and the conservation officer needs to understand what was done and why.
Oliver Pemberton-Fox
Conservation Architect, RIBA
Bristol
The hearth surround is Bath limestone with a bolection moulding drawn from an 1840 pattern book. I gave them the reference and they produced shop drawings within a week. On site they were meticulous — the joint between the two jamb stones is so fine I have to look twice to find it.
Harriet Sinclair-Webb
Interior Designer
London
Our estate has three miles of boundary wall, some of it 300 years old. We've used Chisel for five years now on an ongoing repair programme. They understand that the goal isn't a restored wall — it's an old wall that works. The difference shows in how they approach every job.
Edward Cavendish-Moore
Estate Manager
Wiltshire
Free Resource
The Stone Selection Guide
32 pages. Stone identification, mortar compatibility, bedding orientation, and weathering prediction for England's principal building stones. Written for homeowners, architects, and estate managers.